How to Create An Official Developer Steam Page? And Why You Should!

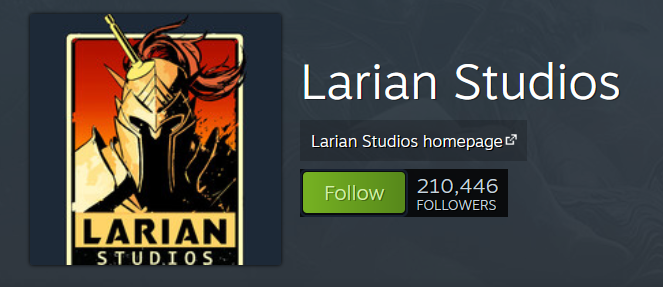
Ever clicked on a “Publisher” link on Steam and then saw their professional looking Steam page with all their games? Too bad Developers can’t have such a page, right? Well, they can! And this article will tell you how!
🔥 After following this tutorial, you’re going to have a professional-looking developer homepage instead of that forgettable search results page.
NOTE: This article and all info in it was originally written by Matt Hackett. He gave his approval to add this info to our Treasure Trove and I’ve only made some small edits here and there. You can check the original article [HERE]. The video below is also his, so give it a watch!
Why should you make your own Steam Developer Page?
Before we get started with Matt’s guide, perhaps a short explanation about why this is important to have. Outside of the improved visual appeal and looking more professional, the biggest benefit by far is that it allows players to FOLLOW your developer page and get notified of major changes:
- A new game being created
- A demo going live (this one is huge!)
- The game releasing
Steam sends an email to your followers very similar to the one your wishlisters get, but in this case for games they may not even be aware of yet. If you’re planning to release more than just one game in yourlifetime, then each subsequent game you launch will reap the benefits from following these simple steps.
7 Steps to create your Steam Developer homepage
These next steps assume you already have a Steam account and at least one game created. If not, create a Steam account, go to your Steamworks Dashboard, click the big green Pay Steam Direct Fee button, and pay the $100 to get a new app ID. Setup your new game, then come back & follow the below steps:
1) Set DEVELOPER and PUBLISHER for your game(s)
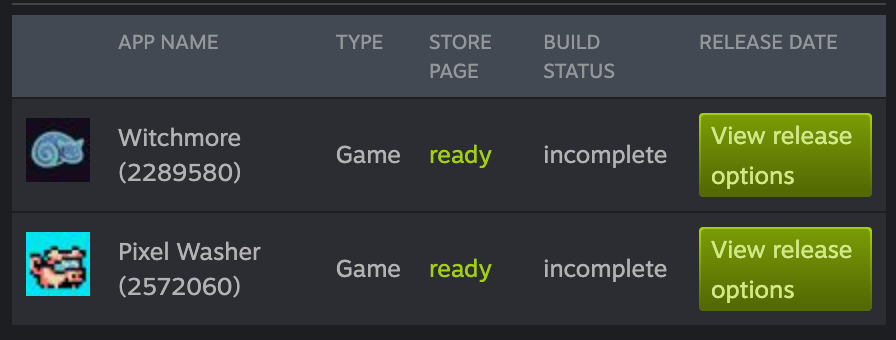
- Navigate to your Steamworks Dashboard.
- Scroll down to your app(s) and click on the title (e.g. Pixel Washer).
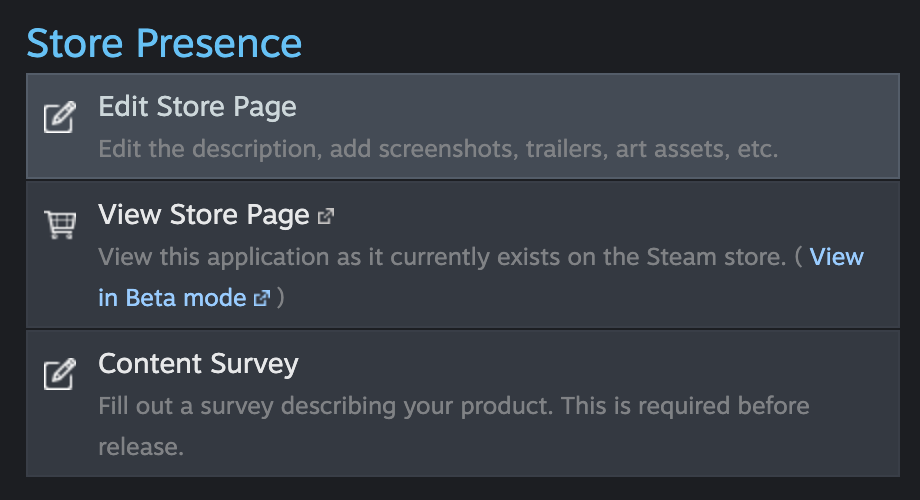
- Scroll down to Store Presence, then press Edit Store Page.
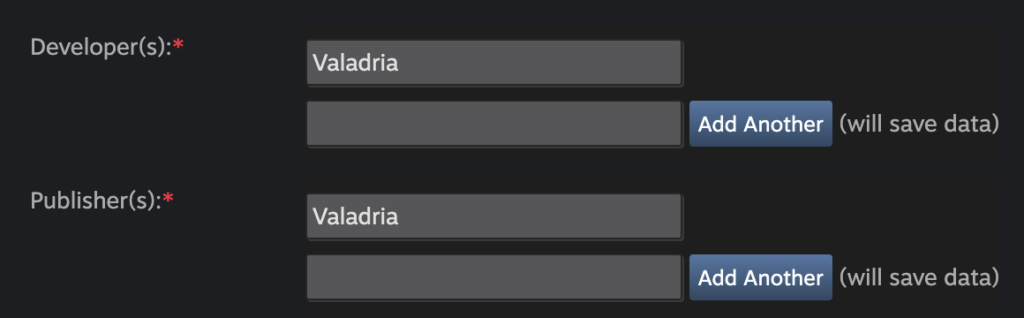
- Under the Basic Info tab, set Developer(s) and Publisher(s) to your company or organization’s name. (You’ll use this name again below.)
- Scroll down to the very bottom & press the big green Save button.
- Select the Publish tab, then press the Publish to public button.
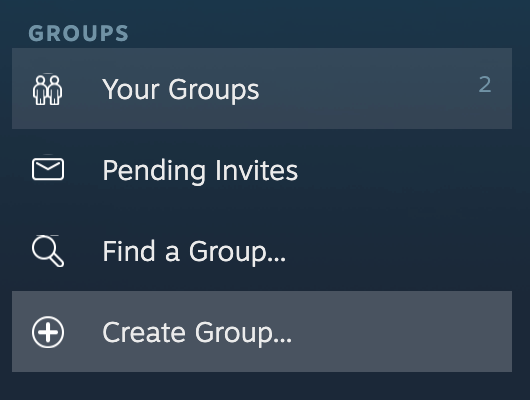
2) Create a Community Group
- Login to Steam Community
- Click your profile name in the upper-right (e.g. Valadria).
- In the dropdown, click View my profile.
- Scroll down to the bottom-right, and click Groups.
- On this new page, scroll down to the bottom-left, and click ⊕ Create Group…
- Fill in the form including Group Name, Abbreviation, and Group Link. (These should generally match the name of your company or organization.)
- Check the box labeled Public Group? ✅
- Then click Create, and on the following page, Create again.
3) Setup your Community Group
Now you have a community group that you can link to your game’s page. Let’s finish setting it up:
- Set Abbreviation and Headline to whatever you want.
- In Summary, describe your group (you can use BBCode to link to your games).
- Fill out Custom URL, Language, Country, and State/Province.
- Under Associated Games, search for & select your Steam game(s).
- Under Avatar, press Choose File then select an 184×184 pixel image. (Don’t have one? I suggest either taking a quick selfie, or cropping a square from one of your game’s screenshots.)
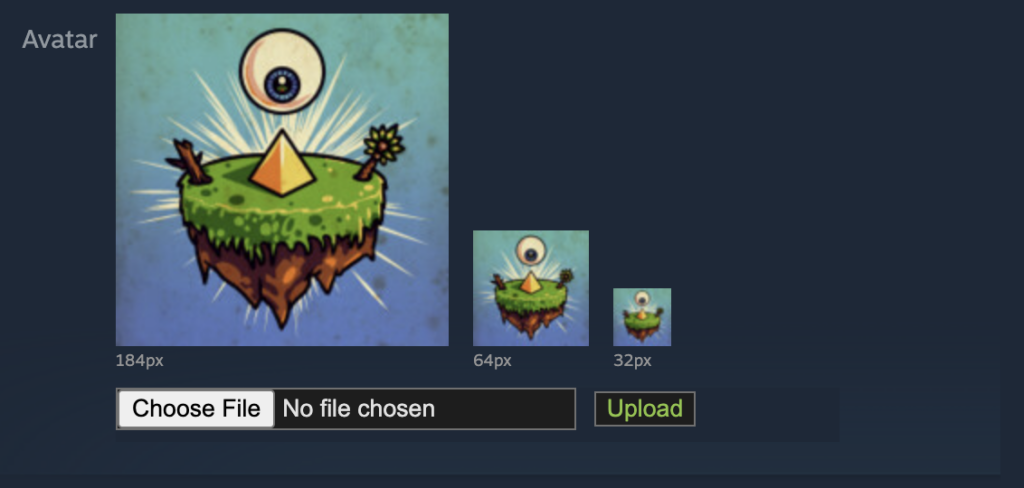
NOTE: Some people have had had issues with the uploaded image not updating. If this is a problem for you, try contacting Steam support.
4) Associate your game(s)
Navigate to Steamworks: Homepage Setup. Under LINK TO CREATOR PAGE, select your group, then press the big green Save Changes button.
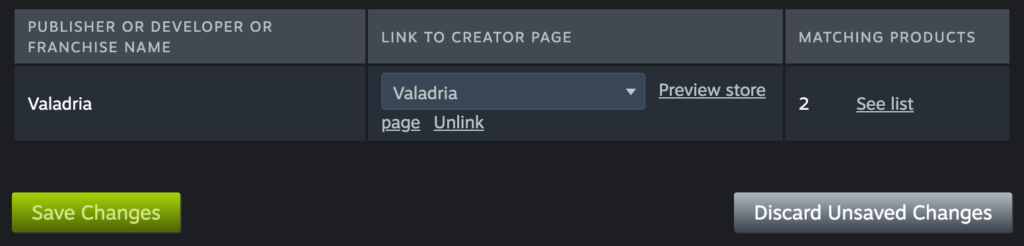
NOTE: this step can take some time to propagate throughout Steam’s servers. If you don’t immediately see your changes, Steam recommends waiting at least 5 minutes & checking back later.
Pirate PR Note: We were told by a client (Q-Games) that this step isn’t always sufficient and the Developer/publisher link on their Steam page only correctly clicked through once they also added that game to their list on their developer page. So keep this in mind!
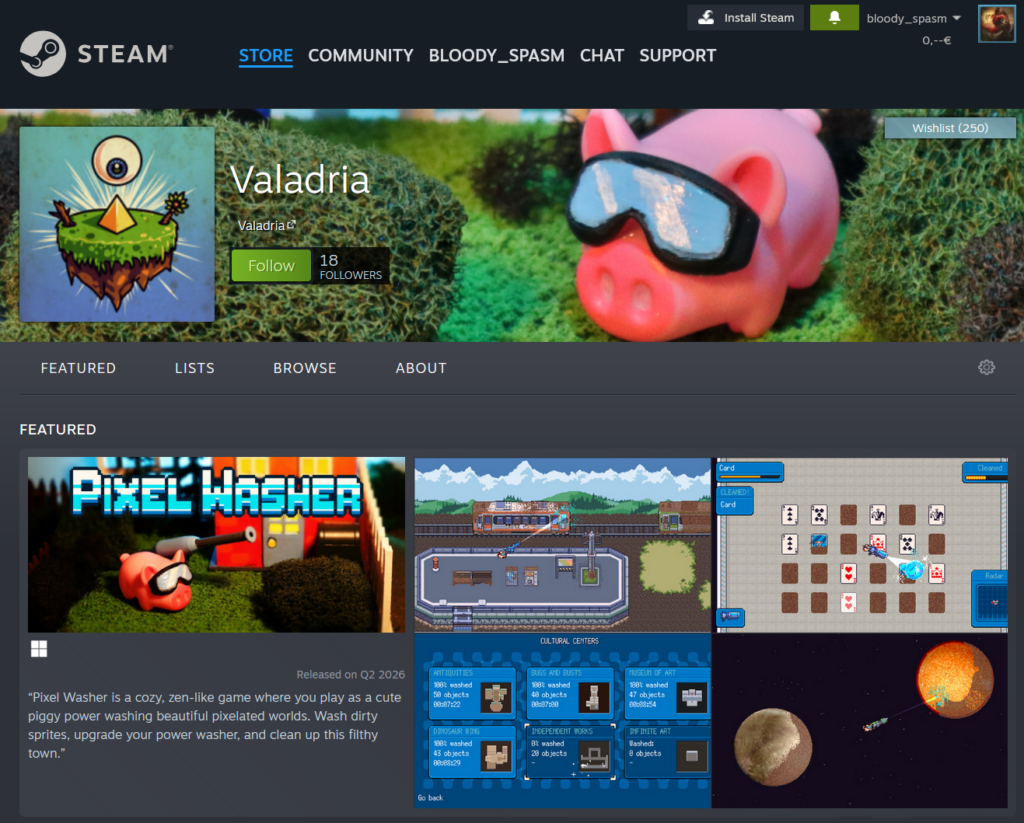
5) Administer your new homepage
On this same page, click Preview store page. This should take you to your new homepage, which looks something like this: https://store.steampowered.com/curator/43510019?ref=valadria.com
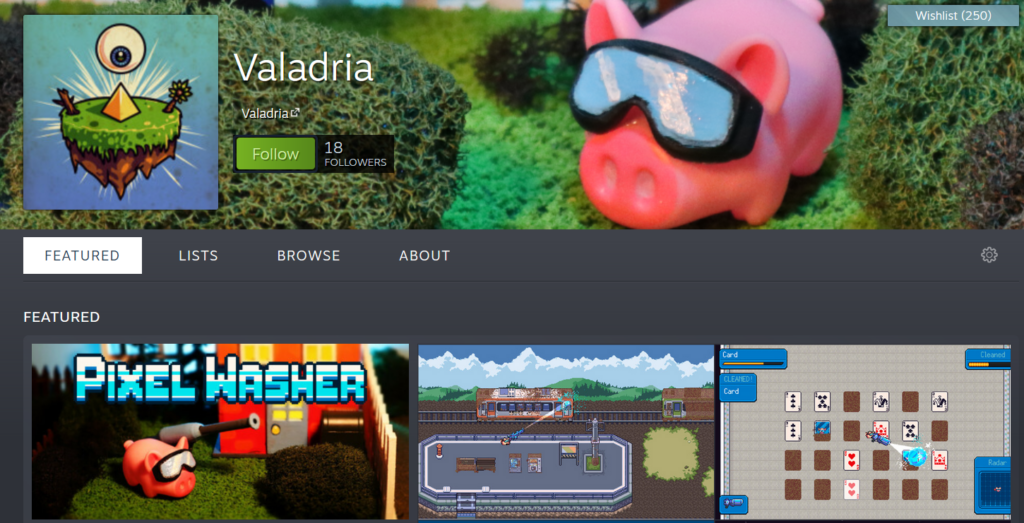
Now press the ADMIN tab.
As you’ll see, there are many options on this page. It’s worth taking the time to poke around & see what all you can do (for example, featuring games & creating lists). For now, let’s set your “vanity URL” and a nice background image.
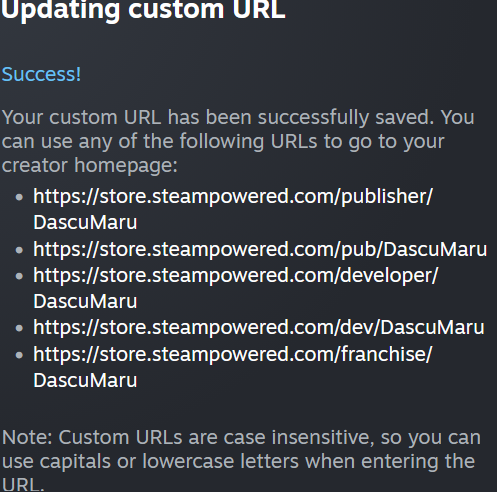
6) Set your custom/vanity URL
- In the left sidebar, press Edit Creator Settings.
- Scroll down to CUSTOM PAGE URL.
- Under ENTER CUSTOM URL SHORTNAME, enter your company or organization’s name (e.g. Valadria) or whatever you want here.
- Press the Save button.
Pirate PR note: this step is important, it’s what makes your curator URL (https://store.steampowered.com/curator/45955777) look like a developer URL (https://store.steampowered.com/developer/DascuMaru) and enables many others too:
NOTE: I also highly recommend setting WEBSITE and SOCIAL MEDIA ACCOUNTS
7) Set your background image
- In the left sidebar, press Open page editor.
- At the top, to the right of the green Follow button, press the pencil icon (✏️).
- Select (or create) a 1500×220 pixel image for your background banner. (Don’t have one? I recommend cropping one of your game’s screenshots.)
- Under Background image, select your newly uploaded image.
- Press the UPDATE button.
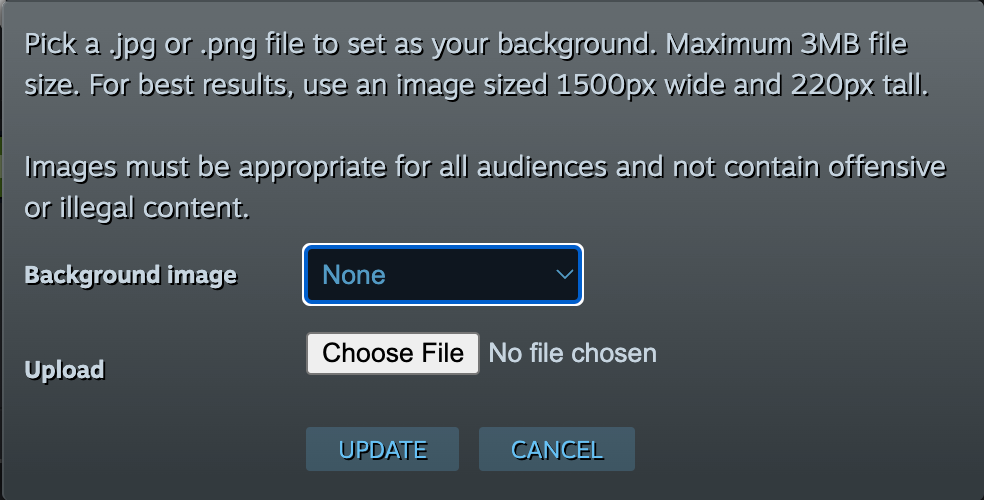
NOTE: Keep room for the Steam UI (your profile image, name and follower count) so it’s wise to keep the left hand side empty.
That’s it, you’re done! Enjoy your new creator homepage.
Many thanks to Matt Hackett for the original article [HERE].
New Customisable Options
Valve just shared a video highlighting new options for pimping your Developer or Publisher page, have a look:
Did we forget something obvious, or do you have insights to share?
DM us on Twitter or use our Contact form!
We hope that you’ve learned something new from this Treasure Trove post and if you did, please consider sharing it through any of the options below and help spread the knowledge!

Great article, Robby!
Helped us out a lot!