STEAM Live Broadcasts – Best practices and why you should care

For the few of you who aren’t yet aware, Steam also allows you to broadcast straight to your game’s store page. There are no real restrictions on this and you could keep a video running in a loop for as long as you want. But we’ll dive into “when” this best, “why” you should consider it and “how” you can best go about it in the article below. Let’s start with why and when, as there is a lot of overlap in both topics.
Jump to topic:
Why should I live-stream on my Steam store page and when is the best time to do so?
Steam regularly hosts special events to highlight particular games. The best-known one is Steam Next Fest, an event specially made for upcoming games to showcase their demo and hopefully gather enough wishlists to make a bigger impact at the time of release. (this is also one of the best moments to send out your first-ever Press Release if you haven’t yet: make sure press & creators know this is happening!) You can only participate in a Steam Next Fest event once per game, so make sure to pick the one that is right for you. Most often this will be the one closest to your Early Access or Full Release.
But there are also thematic events that could maybe apply to your game. At the time of writing, this is the Pirates vs Ninjas theme, one we’re obviously big fans of at Pirate PR!

Many of these events will have a section with “currently broadcasting” and this is a great way to stand out from the crowd. If other (indie) games aren’t actively broadcasting, you have a chance of being seen instead of drowning in the overly crowded list of games.* You’ll also automatically get the “Live” tag, when applicable throughout the Steam store and popular streams will even surface on the Steam homepage, which in turn generates even more traffic for the stream.
*Make sure to also check Valve’s video & documentation on what impacts your Steam visibility!
With an event like Steam Next Fest, you should be offered to choose 2 slots when your broadcast will be featured. If you’re actively going live with your game yourself to do an AMA, you’ll be tempted to pick one that works for your personal schedule, but try and find out who your main audience is and when they are most likely to browse the Steam store.
EDIT OCTOBER 2024: Live streams will not be as important as they used to be in previous fests. There will be no live stream schedule with reserved slots. It is still beneficial to stream the game (or just stream a prerecorded video), as there will be a section for this during the festival. I haven’t deleted the above yet as it may be a trial run and they may revert to old rules for next events
The biggest factor in deciding WHEN to pick your moment is when other games will be choosing their moment, so perhaps consider not going live at the same time as Rockstar’s GTA VI stream, is what we’re getting at. Avoid being side to side with popular games, but pick a moment right after them, so people can trickle over.
Lastly, one reason why you should consider doing a live broadcast is that it’s featured prominently on your own store page and starts playing automatically. Players who might not have clicked your trailer now get to see some gameplay and that might just be what tides them over into a wishlist or a purchase.
How do I set up my stream?
*Some of the info below is taken, but slightly edited, from the official Steam documentation
Account Requirements
- You will need a non-limited Steam account. This means that the Steam account you plan to stream from must have spent at least $5 USD on the Steam store. This is why it might be a good idea to use your personal account versus a company account, but feel free to buy (one of your own) games to unlimit the developer account 😉
- The account you plan to stream from must own the game it will be streaming from. Even if you’re not going to be livestreaming it, but plan on sharing a prerecorded video.
- The account must have the “Broadcast Live” permission in the Steamworks partner account.
Setting up your Stream using RTMP
To send a video to a Steam broadcast, it has be sent through RTMP, a special live stream protocol. You cannot upload a video to Steam like to YouTube – it has to be sent in real-time with software like OBS or any other streaming tool. Below are the steps detailed by Steam themselves on how to set this up:
- Go to http://steamcommunity.com/broadcast/upload/
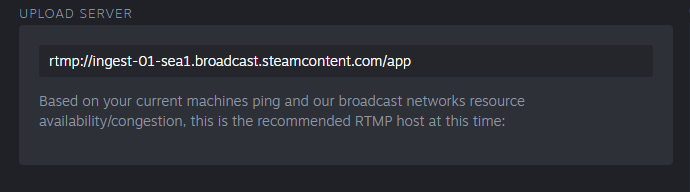
- Check the Upload Server. Steam will automatically select an upload server that’s close to your current location based on your IP address. If you want to select a different upload server, you can do so using the list on the page. The computer that is streaming your game will send video to the upload server, so it’s important to pick one that will have the lowest latency possible, usually the one geographically closest to you.
- Locate your RTMP token.
You will need to enter this token into your streaming software. An RTMP token is a unique identifier to allow you to stream on Steam. You will generate this token at https://steamcommunity.com/broadcast/upload, and enter it into the software you plan to use to stream your game to Steam.
Important: Treat your token like a password, and never share it, as anyone who has it can stream as you. If you believe your key is compromised, you can invalidate it and generate a new one on this page.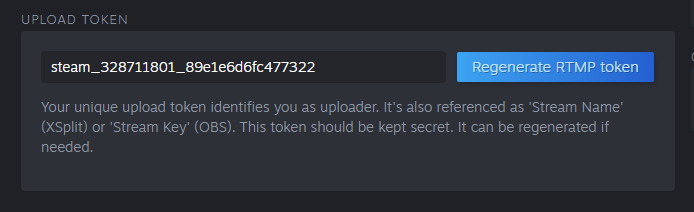
- Enter Your Game’s AppID
You can see your game’s App ID by visiting your game’s App landing page in Steamworks or going to your game’s Steam store page–your appID is in the URL. Note that you should only use the appID for your “base” game–do not use the appID for DLC, Demos, Soundtracks, or other secondary application types.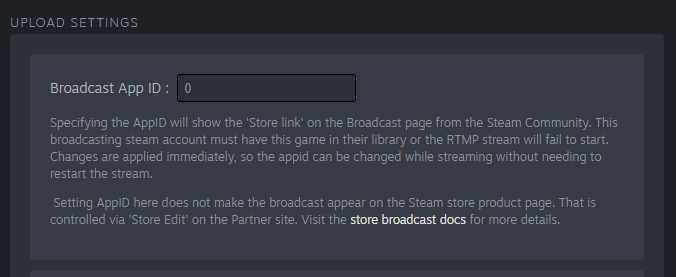
- Set Your Broadcast Permissions
By default, your stream is set to “Friends Only”, which means it’s only visible by you and your friends on Steam. This is a good way to test your stream before it’s publicly visible on your store page. It will be visible by clicking the “Your broadcast URL” under Quick Links on this page. Once you are ready for your stream to appear publicly on your store page, you can change this permission to “Public”.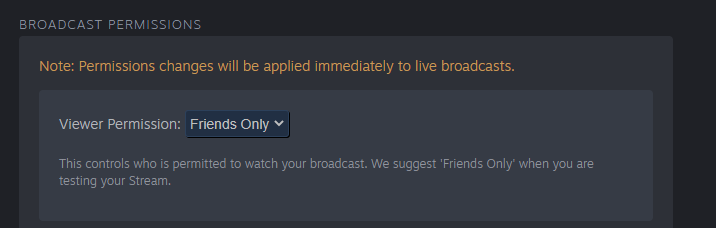
Setting up your tool for streaming to Steam
If you’re going to host your Stream yourself, we’d recommend OBS and you could even dedicate a separate computer to continuously play the video on loop for as long as you want. To save you the hassle and make the set-up easier, we recommend using Robostreamer. They offer 120 free hours, which is perfect for a Steam Next Event, but they have affordable rates for when you need to go beyond that limit.
There are several software tools available for streaming your game to Steam. OBS is a popular free and open-source option. Below are steps to get your stream set up in OBS. Steam supports any broadcast software that supports the RTMP protocol.

- Navigate to File–>Settings–>Stream
- In the dropdown menu, select “Custom…”
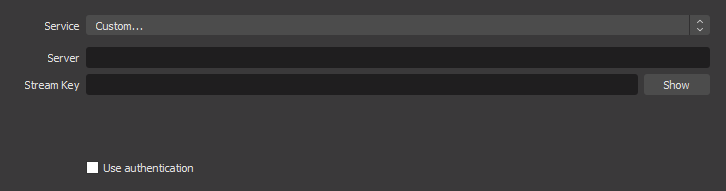
- In the “Server” field, enter the “Upload Server” you selected at http://steamcommunity.com/broadcast/upload/
- In the “Stream Key” field, enter the token provided at http://steamcommunity.com/broadcast/upload/
- In OBS, navigate to File–>Settings–>Output
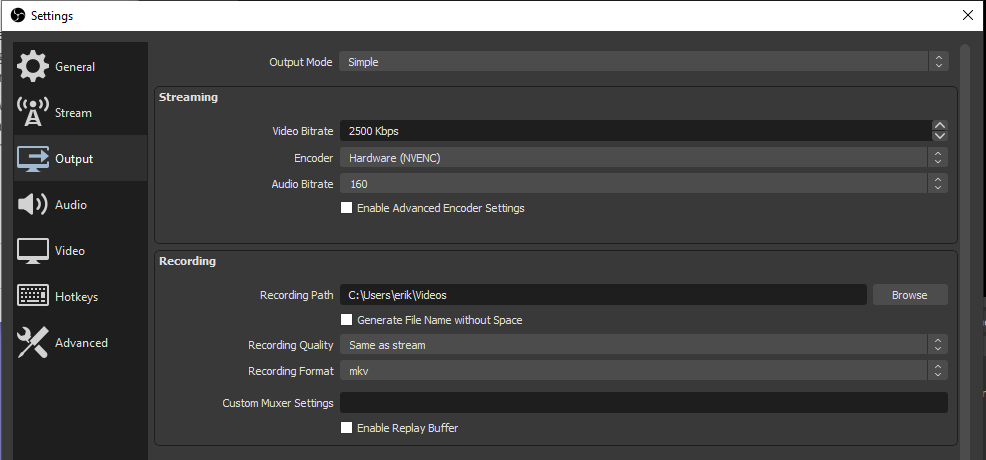
- Under Output Mode, select “Advanced” in the drop-down menu.
- On the Streaming tab, enter Keyframe Interval to 2. Note: This step is important. Without this setting your stream will fail to start.
Testing Your Stream
Once you are ready, begin streaming your game using OBS. Next, go back to http://steamcommunity.com/broadcast/upload/ and look for a link to the right of the page called “Your Broadcast URL”.

You should see your gameplay being streamed on this page. At this point, if you set your broadcast permission to “Friends only”, your stream is not public yet.
Best Practices for your Steam Live Broadcast
Here are some tips to make the most of your Steam Live Broadcast, you don’t NEED to follow all of these, but they can help with the visibility and ease of use.
Create a Steam Event
Let your community know about your stream. Create a new event from the Event tools on Steamworks and share it on your social media or even send out a Press Release if you’re planning something big like letting a well-known content creator play your game or doing an interview.

Big events, like Steam Next Fest will have a specific event that you should pick instead:

Upload artwork with a CTA
Steam allows you to upload 2 distinct artworks for your livestreams that you can display to the sides. You only need to do that step once, but you may want to change the Call To Action, depending on your game’s current state. Eg: “Wishlist now” or “Check the demo” or “Get it at 50% off“.
NOTE: You can upload a LEFT & RIGHT image, each should have 155×337 dimensions
Where to upload these?
Store Page Admin > Graphical Assets > Broadcast Assets > Custom
(don’t forget to save & publish!)

Similarly, take notice that most people won’t watch your entire stream. Repeat your important call to actions a few times DURING your stream, at least once per 15-20 minutes.
Spread the word!
Don’t count on Steam to do all the work for you! Share the news of your broadcast on your social media and in your community (Discord) well in advance. Make the broadcast something special that your fans will enjoy and their viewership and engagement might just be what pushes you from the overview of broadcasts, to the featured one.

Collaborate with content creators
Send out a Press Release before the event, or use key distribution platforms or a social media post to find content creators who are willing to play your game. You can then either ask them to livestream on your store page, or ask their permission to use (part of) their videos in the loop that you’ll broadcast. Make sure to generate some appeal for this by highlighting them: give them a shout-out on social media, display their Twitch or YouTube channel clearly during the stream or reward them through some other means like early access to new content of your game.
Use Robostreamer or other tools to make your life easier
Most developers or publishers seem to opt for having a dedicated streaming computer that runs the video on a loop, but there are various tools you can use right now that handle this part for you without the need of additional hardware. We recommend Robostreamer, as they offer 120 hours for free, but feel free to look for alternatives.
Be flexible on your planning
When you intend to go live yourself to answer some questions about your game, consider going live before the official slot you picked for a Steam event. That way you already gather a small audience on your social media or through a post on your Discord, so when the actual scheduled event starts, it has a better chance of getting featured.
Also make sure you are well rested and prepare to continue streaming after the scheduled time. If your stream picked up a lot of viewers, you may want to hang around for 1 or 2 more hours and see how the audience evolves. Even if you’re playing at a weird hour at night, something like this might just be worth sacrificing a few hours of sleep to, if it’ll get you a ton of wishlists.
Did we forget something obvious or do you have insights to share? DM us on Twitter or use our Contact form!
We hope that you’ve learned something new from this Treasure Trove post and if you did, please consider sharing it through any of the options below and help spread the knowledge!